NX - A Virtual Desktop to the PPPL portal Cluster


    The "portal" computers are the set of login nodes to the PPPL Research Computing Center.  These machines, named sunfireXX, are the user's entry point for developing software, analyzing data, and submitting batch jobs.  The portal computers do not have graphics hardware and do not run an X-Window server.  They are limited to running command line shells.  To overcome this limitation and provide a graphical interface to portal, PPPL has licensed the NX Server products.  The NX server provides a virtual graphical desktop that simulates a Linux workstation with its own graphics hardware and X-Window environment.  NX is developed by NoMachine in Luxembourg, Belgium.

    The NX system provides a Linux desktop to the PPPL "portal" computers.  NX is a client/server system where the client runs on a user's desktop or laptop computer.  The client computer can run Mac OS, Windows, or Linux.  The NX desktop is displayed in a window on your computer, as in Figure 1.  It can run programs with graphical user interfaces, display images, and provide a multi-window environment on portal.  Performance is typically faster than just an X-Window connection.

    When you connect to NX you can choose either KDE or GNOME as your desktop environment.  Your desktop will be preserved from one client session to another.  This enables you to connect to the same desktop session from your home computer as well as from computers at the lab.  If you are going to make a connection from outside of PPPL, then be sure to use your SecureID and log in to the VPN beforehand.
    nxoverview

Figure 1 - An NX Desktop to "portal" is displayed in a window.


1. Client Program

The NX client program runs on your local computer.  PPPL is currently running version 4.5 of the NX server.  You can download the corresponding client program for your computer from http://w3.pppl.gov/fgweb/nx/clients4.5
This web page has options for Windows, Mac, and Linux.  It will be version 4.5.
If version 4.5 of the NX client does not work with the operating system on your computer then you should install the latest version of the NX client from the NoMachine website http://www.nomachine.com
.

1.1 For Mac:

Download the file nomachine_4.5.0_1.dmg.
When the download is complete, about 27 megabytes, open a Finder window and go to Downloads.  Double click on the file named nomachine_4.5.0_1.dmg and it will bring up the NoMachine installation window.  Double click on the NoMachine.pkg icon.  This will bring up the Install NoMachine window.  Go through its installation steps.

To run the NX client, click on the magnifying glass in the toolbar and type in:  nomachine.  Select the NoMachine application.  Continue with the set up instructions in section 1.4 on this page.

You can disable the help screens by checking the box for Don't show this message again.

1.2 For Windows:

Download the file nomachine_4.5.0_1.exe.  When the download is complete (about 28 megabytes) select the downloaded file, right click on it, and choose "Privilege Manager Install/Run Elevated".  Run the EXE file and go through the Setup Wizard to complete the installation.

If you are not able to run this exe to install the client, then go to the icon in the taskbar for the PPPL Software Center.  Select the option for NoMachine and go through its installation procedure.

To run the NX client, go to All Programs in the start menu and select No Machine NX client.  Continue with the set up instructions in section 1.4 on this page.

1.3 For Linux:

Download the file nomachine_4.5.0_1_x86_64.tar.   As root, cd /usr and put the file in /usr.  Then run:
tar -xvf nomachine_4.5.0_1_x86_64.tar
/usr/NX/nxserver -- install

Then run the client:  /usr/NX/bin/nxplayer

1.4 Defining Your Initial NX Connection

Run the NoMachine client program to define a connection to the NX server.  Click on the "New" icon or on
<Click here to create a new connection>  as shown in Figure 2.

nmfig2
Figure 2 - Defining a new connection to the NX server.


The program will guide you through 5 steps to define a connection.
1.  Protocol - Set the protocol to NX.
2.  Host - Enter host name:  nx.pppl.gov
     The port number should be 4000.
3.  Authentication - Use the system login.
                                   Select Password.
4.  Proxy - Don't use a proxy.
5.  Save as - Enter a name, such as nxV4.  Finally click on Done.  An icon for your description will be shown as in Figure 3.

Turn off the checkbox for "Use UDP communication for multimedia data"
      This checkbox is in the Advanced menu. 


fig 2e or 3
Figure 3 - A connection to the NX server has been defined.


The NoMachine client program will automatically save your definition for future use.  When you start the program again you
do not have to repeat the definition process.  You can just start using the connection that you defined as described in section 1.4. 
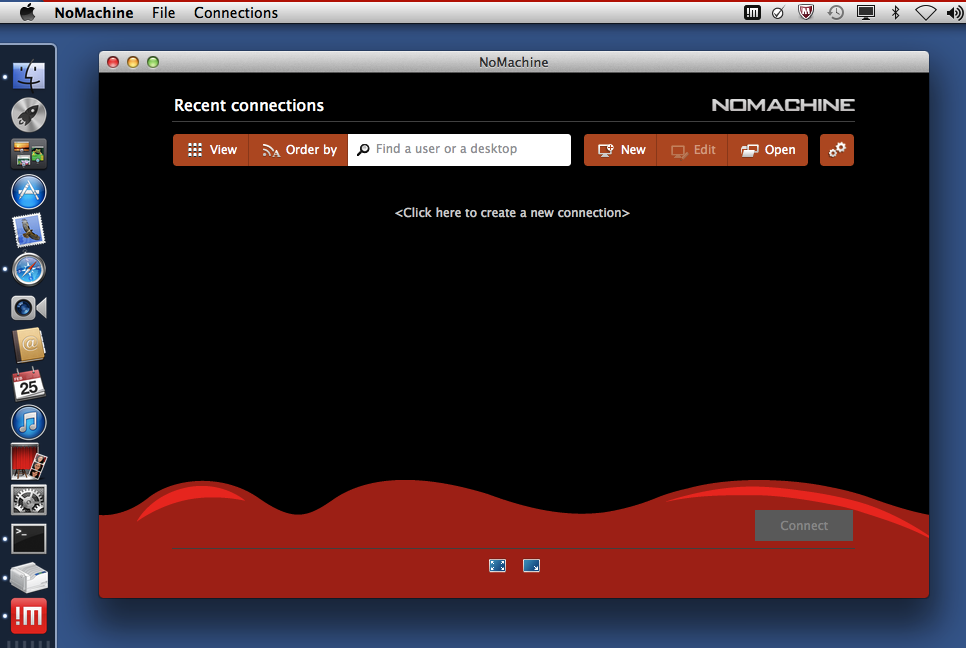
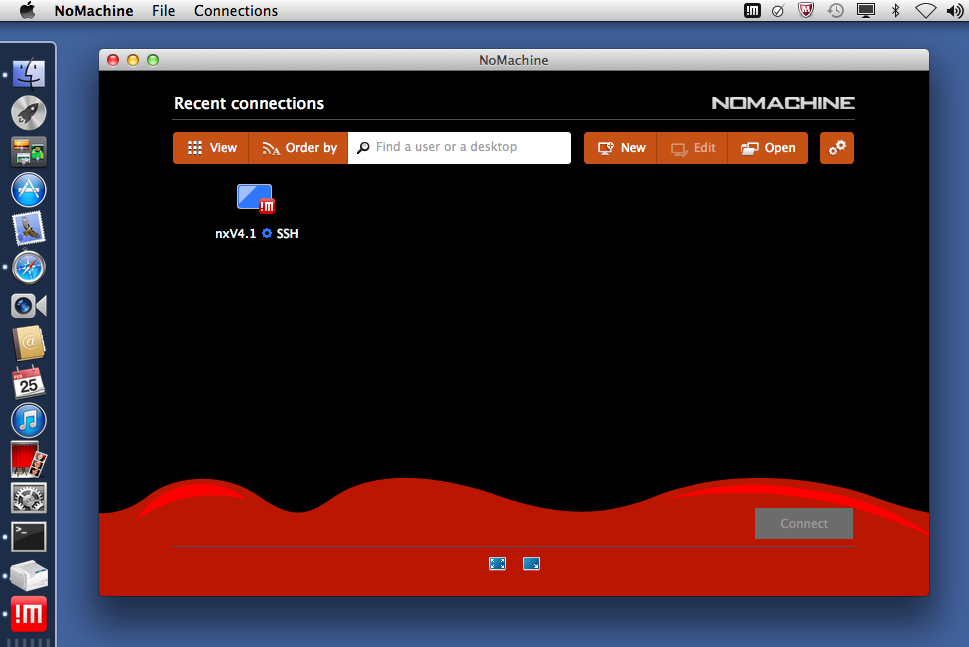
A typical work session will start with the screen shown in Figure 3.

1.4 Connecting to the NX Server

Click on the icon to select the connection that you have defined.  Then click on Connect.  This brings up the login shown in Figure 4.
Enter your username and password and click on OK.

nmfig3
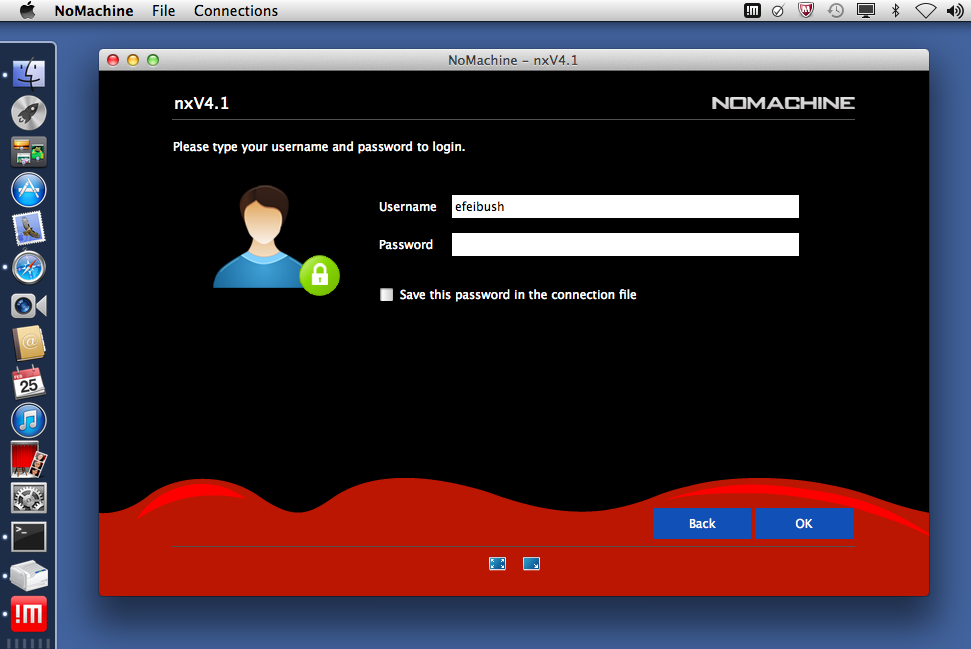
Figure 4 - Login screen.


When the login completes it brings up a screen showing existing connections (if any) to the NX server.  You may see connections from other users.  To show just your own connections click on the View icon.  To create your initial desktop, click on <New virtual desktop or custom session> shown in Figure 5.

nmfig5
Figure 5 - Creating a new desktop.


Next you can choose your desktop environment.  Click on either GNOME or KDE.  Note:  GNOME produces a sharper
looking display than KDE so GNOME is the recommended choice.  Then click on Continue as shown in Figure 6.
The new custom session lets you create a "rootless" window for a single application.  Choose custom only if you want
to run one program or just one shell window.

nmfig6
Figure 6 - Choose GNOME or KDE for your desktop environment.


Now you should have a desktop displayed in the client window.  Initially you are logged in to nxsrv01 or nxsrv02 and placed in a temporary /home directory.  This is not your /u directory and does not contain any of your files.  Do not save any of your work in your /home directory.  This computer does not mount your /u home directory.  Therefore, in each terminal window that you open, ssh to portal to get to your /u directory.  ssh to portal does not require a password on this computer.  X forwarding is on by default.

2. Troubleshooting

2.1 NX client crashes

If your client program suddenly exits (when trying to connect) it is likely that you have to remove NX client from your computer and re-install it. Windows users should contact the Help Desk and request removal of all "hidden" nx files.

2.2 Client Connects but shows all black window or Connection Fails

This is usually caused by a problematic NX or gnome environment in your directory on the NX server computers.  Connections will also fail if you have more than 5 NX sessions on the servers. You can try to correct this yourself by terminating all your open sessions. In the client, right click on each of your sessions and select "Terminate session" from the pop-up menu. Then log in to each of the 4 computers:  nxfront, nxsrv01, nxsrv02, nxsrv03.  In your home directory on each computer, run:

rm -rf .gconf .gconfd .gnome2 .kde .nx

2.3 Client is automatically scrolling the desktop

This happens when the size of the desktop is bigger than the client window.  To eliminate the scrolling, click on the NX icon in the menubar and click on Show the menu panel.  Go to Display and click on Resize remote screen.  Then Done, Done to get back to your desktop.  That will eliminate the scrollbars and automatic scrolling.